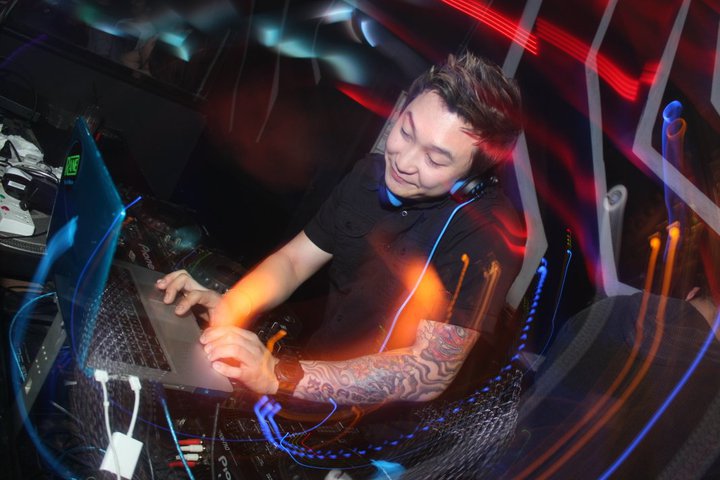
Master K DJ Ken

Master K  DJ Ken
Awesome DJ Ken that I admire...

Sunday, September 4, 2011

BABY PHOTOGRAPHY TIPS


You're going to be taking hundreds of pictures of your growing child over the next few years - here's how to make every one of them count. Here are some tips will make your everyday baby photography more beautiful, more meaningful and more fun for you.

Keep it real and tell a story Don't be afraid to include the messier side of family life. That photo of your screaming or yawning baby might tell a much sweeter and funnier story than a generically "pretty" picture.

Get close Get close to your baby when shooting - you'll see an instant improvement in your photos. When your camera lens " frames" your baby tightly, you avoid distracting background details.

Baby's more than a cute face
You can tell a story about your baby without ever showing his face. Think feet, fingers, belly button, shoulder, butt, hair (or bald head), toys, books, teddy bear, bedding, shoes. In ten years’ time, when your baby's a big kid, you’ll love seeing the toys he cherished as an infant and how tiny his feet were.

Lose the flash
Unlike film cameras, most digital cameras take perfectly good pictures in low-light conditions - so learn to turn off the flash. (If you're not sure how, check the instruction book or ask a photo-smart friend.) Move the baby to a reasonably bright setting near a window and shoot away. You’ll be amazed at the elegance of a non-flash portrait. Or go with lower-light conditions; you'll end up with a beautiful movement “painting” of your little one…try it!

What's your angle?
Unusual perspectives can make for more interesting photos. Try these: To add energy to your picture, turn the camera on an odd angle so that the picture's horizontal lines are not perfectly straight. Or try putting Baby on the floor and shoot him from above. Or (this one's a two-person operation) lie on your backs on the floor and ask your partner to hold the baby in the air in front of the camera while you shoot from below. Be daring, and you'll find other unusual angles.

Be prolific
Pretend you’re making a movie about your baby and that each shot is a still frame. This way, you'll take more pictures -and the more pictures you take, the more chance you have to take a great one. If you've got a digital camera, all the better - memory cards are cheap!

Think photo series
Gather your photos in album groupings to tell a set of unique stories. Ongoing series ideas: "Baby Day by Day" (a picture a day - title each shot with the date.); "Baby's Toys" (name the toys and who offered them); "Baby's Smiles" (title by date); "Baby Tears"; "Baby's Friends" (title by names): "Holidays with Baby" (title by celebration and year).

Background matters
Sometime a simple change of background (a colorful blanket under your newborn, long green grass, Mom’s beautiful skirt can turn a good photo into a great one.

Be candid
A great picture does not have to show your baby gazing at the camera. Sometimes a contemplative, peaceful moment says much more than a perfectly framed smile.

Keep yourself in the story
Often one family member takes most of the photos and never gets pictured. If that's you, hand off the camera whenever you can or just stretch out your arm to hold the camera at a distance, so that photos of you with the baby will be part of your archives. You’ll change, too, over the years, and that’s part of the story.

CHILDREN PHOTOGRAPHY TIPS

1. Be patient
Children are usually active and not always willing to listen to instruction, so they are the boss during the photo shoot. Talk to them, build the connection with them during that short period, so they are comfortable with your presence. Watch them and be prepared with your camera for the good moments. Photos will usually come out more natural and will show the children as children in their own world.

2. Shoot them playing with their toys
Children are usually very attached to their toys, especially their favorite ones. Shoot them while they are playing with them and look for those moments that show the connection between them and their toys. If you want to, you can exclude their faces and focus on their hands while playing with the toys.

3. Watch the Foreground and Background
Unless there is a special purpose, avoid shooting in environments with unwanted cluttered foreground and background if you can. Note that the keyword here is “unwanted”. So if you want a toy or part of a toy to be in the picture to add more stories to the image, by all means do it. Pay more attention to have clean background. Avoid having something vertical behind them that will look like as if it’s getting out from their head. Your main subject of attention is the children, hence removing those unwanted objects helps to emphasize your subject of attention. If you are outside at the playground in the park and you want to photograph the children playing, you can do few things to get a better picture:

  • Move closer to them to isolate them from the busy surroundings and include part of the playground setup to still give a sense that they are playing at the playground. You don’t have to include the entire setup of the playground.
  • Choose an angle where the background that is just behind them is clean or cleaner. Again, avoid vertical bar or pole behind the child’s head.
  • Zoom in or use a longer lens to isolate the child from the surroundings

4. Color does matter
If you know the place you are going to, plan better by choosing a good combination of colors between the children’s clothes and the background/surroundings. Avoid wearing the same/similar color with the surroundings, as it will make the children less prominent in the photo.

5. Shoot during early morning or late afternoon
When shooting outdoor, do it during early morning or late afternoon when the angle of the sun is low and the quality of light is better and softer and the shadow is not harsh. If you have no choice but shooting while the angle of the sun is high at noon time, try looking for a shady place under the trees or where the sun is blocked by tall buildings.

6. Use window and/or curtain to diffuse the light
When shooting at home, try to position the child near the window with his/her face facing the window or having one side of the face lit by light from the window. If you have thin white curtain, use it to diffuse the light even more and create softer lighting if needed.

7. Focus on the eye(s)
When shooting portrait, the eye(s) should be in focus. When you are shooting at an angle to the face, focus on the eye nearer to the camera. Hence, select your focus point upfront and be prepared to move it quickly as the child moves.

8. Look for expression, emotion and relationship
Capturing the children’s expression, emotion and their relationship with the parents or friends will help make a better photo and tell a story. So look for those funny faces, giggles, laughter and even cries.

9. Rule of Third
Play around with the composition. If you are used to photographing the child by placing them in the center, try different approach now. Position them off-center by following the rule of third. See image below. Position the main subject at either one of the four intersections.

10. Eye-Level shooting
Photographing children from a high angle creates an unpleasing perspective. Bring yourself down on your knee, or even on your tummy to be at the similar eye-level as the child.

Now, extra three last tips for you.

11. Understand your camera
Read the manual and learn how to use your camera optimally. Practice often to play with the setting, switches, buttons, etc, so it becomes second nature and you can operate it fast when you need to change the setting to adapt to certain situation.

12. Use manual exposure setting
If you are like me who prefer not to use flash, set the camera exposure mode to manual especially when the lighting is constant. Follow these steps to decide:

  • do I want more of the background or do I want the background to be completely out of focus? This will determine what aperture you will use.
  • after deciding what aperture to use, check if the scene can give you fast enough shutter speed to handle the subjects. If children are running and moving actively, I usually ensure that my shutter speed is at least 1/250 sec or faster depending on the speed of the children movement.
  • if shutter speed is too low to freeze the subjects, increase the ISO so you can get higher shutter speed setting.
  • if shutter speed is still too low after increasing ISO to the max, you may want to go back to point no. 1 and compromise by not getting more of the background. Use the largest possible aperture you can for the lens.
  • if all have been done and nothing else you can do, don’t be discouraged, be prepared with your camera and press the shutter button when the children is at the peak of their movement, when there is usually a brief moment of freeze

13. Have fun and take LOTS of pictures
After reading all the above, I am going to tell you that rules are created to be broken. So, don’t be too stressful about following the guidelines. It may deter you from liking the process of photography. Just take LOTS and LOTS of pictures. As you review them one by one on your computer monitor, you will learn what works and what does not. Be brutal to yourself when you are learning. View the photo at 100% on your computer monitor to be able to see if it is sharp or the focus point is where it should be. Review the composition and play around by cropping the photo and see which one works best. As you learn more and practice more, you will notice that you will tend to CREATE the image in the camera right in the first place. It will become second nature as you progress. Photography is fun, so have fun. If you need to break the rule in order to create an image that you think will have great impact, by all means, do it.

Hope you find these useful and keep shooting.

FOOD PHOTOGRAPHY TIPS...

1) Keep the background clean

Make sure there is a color contrast between the background and the food, don’t have the two be the same color or a similar shade. For example, strawberries served on a red plate isn’t going to stand out. Keep the background simple and uncluttered. If unsure, stick to a plain white background.

2) Adjust the white balance

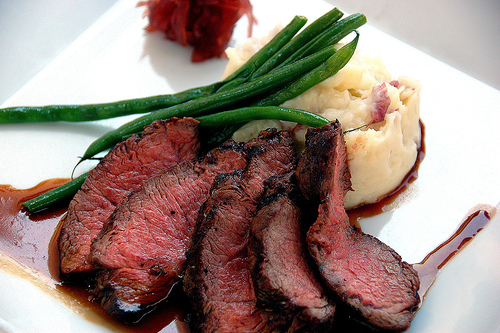
Adjust the white balance on your camera according to what you’re shooting. Meat should always be shot in warm tones as a blue-ish tinge under some fluorescent lights would make it look ghastly.

3) Use natural lighting

Whenever you can, try to shoot using natural lighting. Shoot during the day near a window where you would get plenty of natural sunlight. When you must shoot at night, try avoid using flash directly on the food as it’s too harsh. Instead, use a flash diffuser or have the flash bounce off a ceiling or wall.

4) Use a tripod

Most food photography will be done indoors, where there might not be enough lighting. Use a tripod whenever you can as it beats trying to hold very still for long a amount of time.

5) Small details make a big difference

Don’t disregard the small stuff. Keep in mind that using nice cutlery and a clean serving plate/bowl could make all the difference transforming a nice photo to a fantastic one.

6) Get up close

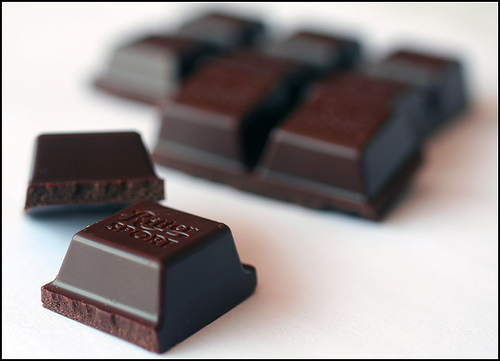
Instead of only taking photos of a full plate of food, take some macro shots too. Getting up close to your subject will bring out the textures and finer details, making it more interesting and intriguing.

7) Cut it, slice it, dice it!

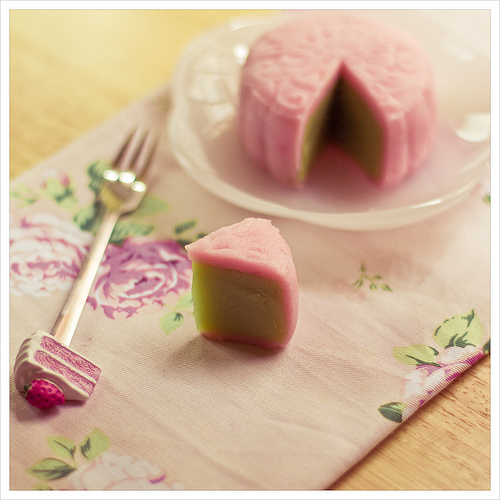
As with anything, you shouldn’t just take something for its face value. With food, sometimes it’s what’s inside that can create a great shot. I love cutting up crumbed foods for the contrasting textures. I also love cutting up cakes just so I can get the different layers.

8) Take photos from all angles

Don’t just take a photo from a bird’s eye view, try different angles. Left, right, top, bottom. Feel free to even move the food around and come up with different compositions.

9) Use props

Don’t be afraid to jazz up the set. Maybe a glass of orange juice to go with those pancakes? A bottle of wine in the background with your steak and mash meal? Or maybe some hundreds and thousands sprinkled around your cupcakes? Do remember to keep it simple as too many props can be distracting.

10) Cheat if you have to

As long as you’re not planning to eat the food afterwards, there are ways to enhance your food by using some industry tricks. For example, make your food glisten by brushing on some vegetable oil. Create that ‘fresh out of the oven’ steam by placing some microwaved cotton balls that have been soaked in water. Or make perfect-looking ice cream that won’t ever melt with some mashed potatoes.

Friday, September 2, 2011

Wedding Photography

1. Have a ‘Shot List’

What would they like to be included on their picture album? What are the must-have picture moments before, during, and after the wedding day? By listing down in advance what moments they want to be captured will make their wedding photography project a much easier task. Imagine forgetting to take a picture of the couple together with his or her grandma!

2. Assign a Family Photo Coordinator

One stressful part of the photo session is making sure that all family members are present for the shoot. Everyone couldn’t help but enjoy the celebration, so it wouldn’t be surprising if they are all over the place. A family photo coordinator, one for each side of the family if needed, should be assigned to organize everyone for the shot and keep things moving to make sure that the couple will have more time to relish the ‘festive spirit’.

3. Take a good look at the location

This should be done in order to determine the size of the place, where the lighting is best situated, what are the perfect spots for taking the shots, all those things. You can even take a few test shots which can also be used for the couple’s engagement photos.

4. Anticipate everything

They want it to be perfect but you shouldn’t assume that everything will go smoothly as you planned it. So it is good to prepare a back-up plan just in case a bad weather appears. Check the traffic situation on the routes to the wedding destination so you can suggest alternatives for the family members and visitors attending. Charge your batteries and bring extras. Make sure your memory cards are blank (and working!).

5. Set your expectations

Research the work/style of professional wedding photographers that you admire to find out which one works best for the couple. If they wish to have a wedding theme, determine the kind of shots they want to you to take to complement their expectations. You also have to know in advance the cost of all the printed shots so they will not be caught off guard with the amount.

6. Mute the sound setting of your Camera

Do not forget to turn off the sound before the wedding ceremony to avoid ruining the special moments like the kiss or dramatic speeches given by family members and friends.

7. Capture even the smallest details of the event

Do not underestimate the power of details – flowers, rings, the shoes, the hair and even the back of the dress! The menus, table settings, a balloon that escaped to the air, those little things that would add depth and meaning to their wedding album.

8. Have another Camera for standby

Because you will never know if your trusted camera will do just fine in the entirety of the program. Prepare another camera, set it up with a different lens, and use it to shoot different angles of the same shot.

9. Consider an alternative Wedding Photographer

If you have an alternative wedding photographer, the more chances of taking shots from different spots at the same time. You can even talk to your wedding photographers of taking a formal and a candid shot of the same person or situation.

10. The sky is the limit

You can be as funny and refreshing or as serious and passionate as you want to be! It all depends on what shots should be included or how they want the person or situation to be taken. Visualize the right angle, position, or setup. Take candid shots of the key moments. Do not be afraid to ask people politely to position themselves in the best angle you think they would be.

11. Learn how to Use Diffused Lighting

The key is to know how to bounce a flash or diffuse it. Usually, church lighting is not conducive to great picture taking moments. Use a flash if it is allowed but if it is not possible, use a fast lens at wide apertures and/or bump up the ISO.

12. Try capturing pictures in RAW

The couple’s wedding day is the perfect time to do this because it allows more flexibility in manipulating the shots.

13. Put your pictures on display at the Reception

Take advantage of the fact that the whole world can see exactly what just took place in the most romantic moment of the couple’s life. Upload the pictures to a computer or a laptop and display them on a slideshow.

14. Determine the kind of Backgrounds

you will haveChoose uncluttered areas, romantic spots, and shaded portions of the location as your background, especially for your formal shots.

15. Don’t throw away ‘rejects’

Simply because you don’t like it the first time you viewed it doesn’t mean that you cannot use it as part of the wedding album or wedding magazine. Remember that you can always edit all the shots so you can print out the kind of pictures that you think are of the highest quality.

16. Add a creative Perspective

Formal shots are essential to the couple’s wedding album or wedding magazine. But do not forget to take shots from down low, up high, at wide angles etc. to add excitement and originality to your work.

17. Take Wedding Group Shots

Of course, it is good to know that you have not forgotten to take pictures of everyone present in the couple’s wedding day. So that means, climbing a ladder or positioning yourself up in the balcony where you can see everyone and take pictures. Get the bride and groom to be in the middle of a group you want to photograph.

18. Fill in Flash for Tricky Lighting

It is a good thing to give a little fill in flash when shooting after the wedding ceremony or during formal shots. You can dial it back a little (a stop or two) so that shots are not blown out. Fill in flash is a must for shadowy settings or midday shooting conditions.

19. Continuous Shooting Mode for Posed Shots

Use this mode when you are taking formal or posed shots of the couple and other guests. The best shots are sometimes not the first one so you should be able to capture it.

20. Be prepared for the unexpected

Things happen even after you have organized everything and did your homework. The groom’s fly is unzipped, the bride trips a little bit, the flower girl makes tantrums in the middle of the aisle, those things. Do not panic and strive to capture the best angles of the most uncomfortable situations. The couple will forever thank you for that. They might even just laugh afterwards and cherish the fact that it was taken on picture.

21. Enjoy the day

Be relaxed and strive for a good mood. A positive attitude is your best tool for capturing the best parts of the wedding event.

Thursday, September 1, 2011

TAKE A PIX TIPS ;)


It's rather excited to have a DSLR, it seems that in 3 years time, everyone will have one, just like the mobile phones... here are some tips from Nikon Facebook fan-page...


IT'S DSLR...
Patience can make or break a picture. If you’ve found a scene you like but think it would look better if the light were different, wait a little bit. Or make a note and go back to the same location at a different time of day or even season.

Err on the side of shooting more pictures. Take lots of photos, as this will increase your chances of getting that perfect frame. Remember, if it’s digital you can just delete the photos that don’t work out. It’s always better to shoot too many than not enough.


Good photography is about simplicity. Remove distracting items from your photos, crop out parts you don’t need and focus on what's important. Often times it's what's not in a photograph that makes it work.

The difference between a snapshot and a great photograph is that snapshots capture events while photographs capture feelings. Make sure your photo tells a story by thinking about what you’re trying to say before you take the photo.

Your goal today: make a picture that will make people say, "Wow, I never saw it that way before." No matter what "it" is, give it your spin.

SNAP PEOPLE AROUND YOU
Posing a bride and groom for photos is sometimes difficult. Concentrate on close shots of just the two of them, with clean backgrounds. Then create a fun group shot having them in the center, with others gathered around them. Just make sure no one gets in front of them. After all, it’s their day.

Always be prepared to photograph people. Have your camera ready and think about how you might shoot a portrait of people around you. That pre-visualizing is a good exercise, and if you see someone particularly interesting, go ahead and ask whether you can take their picture. The worst that can happen is they’ll say “no.”


Reduce the chance of red-eye in a portrait. Have the subject turn her head slightly away so her eyes are not looking directly into the flash. Red-eye is created from the flash bouncing off the back of the eye.

Look for moments when family members are interacting. Be stealthy and sit back and watch. If you use a longer lens or zoom, they may not even notice the camera, and you can get genuine smiles and expressions.

Shoot a lot of pictures to get good candids. Most people are a little tense and awkward when a camera is pointed at them, but that awkwardness usually begins to go away after the first few shots. Ask them to just relax, and shoot. Shoot a lot.

Get yourself in the picture. Nothing is worse than a vacation with no shots of the family photographer. Get in the picture by using a tripod (or a steady surface such as a wall or a car hood) and the camera’s self-timer to make sure you're included in the family memories.

The eyes, it is said, are the windows to the soul. Capture the personality of your subject, through her eyes. Make sure you can see them by zooming in on your subject or moving in close to her.

If you're photographing someone and you want to remember to send them a copy of the photo, take a picture of their business card. This will jog your memory and give you the contact info you need. You can even write notes with special instructions or reminders on a piece of paper and take a photo of it.

Professional photographers often play music when they're shooting in the studio, to help their portrait subjects relax. When photographing people, ask your subjects what music want to listen to and then crank up the tunes. People smile more easily when they’re listening to music they like.

When taking a portrait of someone, you don’t always have to photograph their face or full body. Instead focus on details, such as a baby’s tiny feet or the hands of a carpenter.

Plan to take people pictures today? Check the LCD after the first few, then show particularly flattering shots to your subject(s). Nothing relaxes people more than knowing they're looking good.

Lots of people crowded around your graduate or bride? Take your shots, then step away and let others shoot. If you need to get in closer, wait until the others finish—they usually just shoot a couple of pictures—and ask the others if it’s OK for you to get in closer. Courtesy in group situations always works in your favor.

Sit at a sidewalk café or the steps of a church and just watch the world go by. Within minutes you will see the ebb and flow of a place and set yourself up for taking pictures that reflect the place. Look for a nice scene and wait for a person to walk through it.

Don’t be afraid to frame portraits or group shot tightly. People’s faces are often their most interesting feature, so make the most of them. Often the legs and the feet of your subjects are not needed at all so crop them out in the camera when you compose the picture.

People in the snow or at the beach can have shadows in their face if the sun’s high overhead, or their face can be in shadow with the sun behind them. Use your camera flash as “fill flash” to lighten the shadows in their face by tuning it on and forcing it to flash

When shooting a portrait, scope out your background and location in advance. Make sure you don’t have distracting items behind the subject, such as tree limbs, power lines or light poles. Make sure the direction of the light is in the most flattering spot (often to the side).

WONDER SHOTS
Look for a single colorful item in a scene that is otherwise mostly monochromatic (black and white), such as a red leaf on a green tennis court or blacktop driveway. This creates a center of interest and can be dramatic. When photographing the Fireworks, use a tripod and slow shutter speed. This way you can get shots that show the full burst of the fireworks in the sky.

Look up and down when walking around. The best picture may not be at eye level. Sometimes pointing the camera straight down on flowers or patterns in the sidewalk will give you impressive results. Looking up at buildings or the sky will also give you an interesting viewpoint.


Don’t pose every picture. Candids are the best way to capture real life. Take photos of your subjects playing, relaxing, and having fun. They’ll be more comfortable with you, and the photos will look more natural.

Don’t force your subject into a pose they are uncomfortable with. It’s often easier if you demonstrate first. So show your subject how to sit, stand or maybe hold their hands in a simple but pleasing way.

To get a shot of someone at sunset, turn on your flash and place the person with the beautiful sunset behind them. With the flash on, they will be illuminated. With the flash off, they will be silhouetted.

Turn your flash on during the day. Harsh shadows often show up in your portraits in the daylight. Fill in those shadows by turning on your flash, brightening up those dark areas. Just go to your flash setting and force your flash to shoot all the time. It will work even in bright light.

Shoot during the “golden hours.” Those are the times of day right after sunrise and right before sunset. The sun is low on the horizon and can produce a golden, warm light that is pleasing to the eye. Landscapes and portraits look great in this light.

Move in close and zoom during action shots. Get a tight shot of your subject that fills the frame with key action. This amplifies the drama and emotion.

Shoot until you’re sure you have the photo you want. Don’t risk losing a good picture because you were worried about taking too many shots. With digital, there’s no need to “conserve film.” Sometimes the best shot can be the third or fourth one.

Compose photos using the “rule of thirds.” Think of the frame as being broken into nine rectangles (like a tic-tac-toe grid over the picture). Place your subject at one of the intersections of the lines for a more visually stimulating photo.

Pick an object that you like (or even one you hate) and take a picture every time you see a similar object. It could be spider webs, interesting doorknobs, or manhole covers. Often these self-assignments can turn into lifelong projects.

Take a photo of an outdoor subject every day. Watch as it changes with the changing light and seasons. Or try to take a photo that looks different from every other photo you’ve taken of that subject.

Use the time you have between errands or meetings to hone your skills. Challenge yourself to find something interesting to shoot while you're waiting in line at the bank or walking to the parking lot from the office.

Give yourself an assignment in abstract photography, with the goal of making something easily recognizable less easily identifiable. You can do this by focusing on just a small part of the subject.

Colors are important not only in a scenic or landscape photo but also in a portrait. Surround your subject with a blue background and the mind automatically thinks "calm." Red is exciting. Even slightly different hues can put you in a different mindset. A bright green makes the mind think of vibrancy (like spring), but a dark green is calming. Put your subject against different color backgrounds to send a different message to the viewer.

To take a nice silhouette of someone or something, position them in front of a very bright light source and meter your shot for the light framing your subject. This will create a beautiful halo effect.

If you're photographing a subject in their work environment or home, find a unique object or element to include in the photo. A woodcarver holding his tools, a firefighter with her helmet and coat, a plumber with a wrench.

Try shooting without color for a day. Set your camera to the B&W or monochrome setting and get used to seeing in Black & White. If your camera can capture NEF files, you can set your camera to write NEF + JPG – the JPG files will be B&W but the NEF files will be in color.

When shooting a subject standing near glass or a mirror, be sure you're not perpendicular to the reflective surface, but shooting on an angle. This will help prevent a reflection of the flash from ending up in your photo.

Look for items with stark contrast—the difference between the lightest and darkest part of the image. Try to capture photos in which some element in the photograph really stands out against the rest of the frame. A rose against an early snowfall, or a seagull in a blue sky. Such juxtapositions can be very striking.

Spend some time shooting textures; for example the look of cut grass, leaves against a sky, or pebbles on a beach. Your photographs don't always have to have a person in them to be striking. Repeating patterns, both man-made and natural, are compelling and beautiful.

Placing your horizon line near the top third or bottom third of the frame instead of right in the middle makes for a more interesting image.

When photographing people at a formal event, have a friend or assistant look for stray hairs, open buttons and other small imperfections. Having someone there who isn’t managing the camera will give you another set of eyes.

Posing a bride and groom for photos is sometimes difficult. Concentrate on close shots of just the two of them, with clean backgrounds. Then create a fun group shot having them in the center, with others gathered around them. Just make sure no one gets in front of them. After all, it’s their day.

Ever see movie directors “frame” a scene by holding their hands up and making a rectangle with their fingers? It really does help to figure out what’s worth keeping in the frame. If your view improves when your hands are covering something, make sure to leave it out of your photo.

By moving closer to your subject you’ll get more detail in the photo, fewer distractions and better composition.

Try not to shoot portraits from below because most people look unflattering in this position.

Auto exposures: Aim for everything except the entire vehicle. With a wide-angle lens, frame the front and let the hood stretch to infinity. If you can find chrome, capture reflections. Collect a series of abstract images of one car's distinctive geometry.

When shooting at a parade, don’t try to capture everything you see. Pick out a few individual elements (a float, a marcher) and make them your subject.

If you have a tripod and lights or stands, get your gear, your background and exposure figured out for the portrait before the subject gets there. That way when the subject arrives you can pay attention to them. This will allow you to be more interactive with your subject and get them in the right pose instead of fiddling with the equipment.

It's much more flattering to your portrait subjects if they crane their necks a bit or look up at you; avoid posing—or catching—people looking down at the camera.

As the cake is delivered at a birthday party, move down low to the child’s eye level to see what he sees when blowing out the candles. The perspective change will add a different feel to your party pictures.

Combine a landscape photo with a family portrait. Place you family off-center to highlight the background. By placing them to the side and shooting a wide shot, you get a great landscape and your family in the same shot.

Always check your backgrounds. With people or scenes, avoid power lines, fences or edges of buildings. Move until you find an angle that makes the background look good and simple. Nothing can ruin a shot more than a road sign coming out of the back of someone’s head.


SHOOTING THE KIDS
Having an assistant when photographing little kids can really help. Get a sibling or spouse to talk to the child, out of sight of the camera (behind or to the side of you). The little distractions will provide more possibilities for you to make better pictures.

Watch kids as they play. They often repeat what makes them happy. Spend a few minutes checking it out before you shoot. That way you can start to plan how you want to make the picture. This will help you get a much more real shot.


Sometimes kids crying or upset can make the best photos. Life is not always about smiles and happiness. Sometimes the pout or sour face can say a lot. And those pictures are often treasured later.


Turn off the flash if possible when shooting baby photos. That burst of light can sometimes frighten the baby and ruin your photo. If you really need the extra light, use an accessory Speedlight and bounce it at the ceiling to create a nice soft fill light.

Kids love to run and jump. Try to use a high shutter speed, to stop as much of that action as possible. Or, if your camera has a Sports Scene mode, try that when they’re racing around.
Sometimes kids crying or upset can make the best photos.

Life is not always about smiles and happiness. Sometimes the pout or sour face can say a lot. And those pictures are often treasured later.

Photograph kids at their eye level. Kneel, sit or lie on the ground. This will give you a unique perspective, plus get you more engaged with them.

At a family get-together, designate one of the kids to be the photographer. Tell him to shoot a lot and have fun, then show him the basics and let him go. You’ll be surprised with what he comes up with.

If you’re visiting a new mommy and newborn baby in the hospital, take photos of the mother only if she wants to be photographed. She may be tired and not feel that the photo will be flattering, so check with her first

Take pictures of your baby at different times of the day doing different things. A soundly sleeping baby is a great subject (keep the flash off to avoid waking him), as is one playing with food or a favorite toy. These shots make wonderful memories.

Successful close-ups of babies often involve eye contact. Focus on the eyes. Use a longer lens, or a macro lens, and get in tight on the eyes and nose. A lot of a child’s personality comes through the eyes. Remember to try to keep the nearest eye in focus, as that will feel more natural to the viewer.

Babies love to see themselves on the camera's LCD. Make a game of "peek-a-boo" out of picture taking and they'll always be smiling when you bring your camera out.

Take pictures of your baby at different times of the day doing different things. A soundly sleeping baby is a great subject (keep the flash off to avoid waking him), as is one playing with food or a favorite toy. These shots make wonderful memories.

Turn off the flash if possible when shooting baby photos. That burst of light can sometimes frighten the baby and ruin your photo. If you really need the extra light, use an accessory Speedlight and point it at the ceiling to create a nice soft fill light.

Successful close-ups of babies often involve eye contact. Focus on the eyes. Use a longer lens, or a macro lens, and get in tight on the eyes and nose. A lot of a child’s personality comes through the eyes. Remember to try to keep the nearest eye in focus, as that will feel more natural to the viewer.

Avoid bright sunlight for photographing babies and pets outside. Try to find an area with bright shade, often under a large tree. That light is often the best, as its soft and natural appearance makes everything look a little better.

Jump for fun. Have your kids line up for a picture. As the photographer, get low, and get ready to shoot. Have the kids all jump in the air at the same time. Capturing them mid jump can bring out their true personalities.

Kids can take incredible photos, but most people never think to hand them a camera. Set your camera on Program or Auto mode and teach your children where the shutter release button is and how to view their photos. Not only does it keep them busy and engaged with their surroundings, but you also may end up with some incredible shots. And how cool would it be to have your kid's photography hanging on the fridge?

Make a great team picture. Get the team together in front of a nice background – maybe the goal, the net or the team logo on the field or floor. Shoot the ordinary, then let the kids have some fun, making faces or funny poses. That’s the one they will always remember.

Patience is a virtue. But it’s a necessity when taking pictures of children and pets. Slow down, watch and keep shooting. Let things develop on their own. A healthy dose of patience can really pay off in much better pictures.


SHOOT AS YOUR TRAVEL
Photograph signs and markers when you travel. This will help you to remember where you were on your trip. There is nothing worse than showing off your travel photos to friends and family and not remembering where you took the shot or the historical significance of a monument.

Learn how to ask, “May I take your picture?” in the language of the country you’re visiting. Besides being polite, it shows respect for the local language and culture, and that can open many doors for you.


Always ask permission—with words or an inquiring gesture—when you want to take someone's picture when you're traveling. Courtesy rules.

When visiting a historic site, try to tell a story with your camera. Move back and shoot an overall photo. It’s even better if you can find a high spot to shoot from, to get a sense of size and scale. Then come in closer and look for details—a sign or something that tells more about the site, especially if it’s in a different language.


When traveling, plan when to shoot the most important icons. Shoot early in the day or late in the afternoon when shadows and light make wonderful lines and bring out the details and textures.


When photographing people on the street or in tourist areas, ask for permission if possible before you shoot. Make eye contact and be polite, and most people will feel flattered. Don’t treat people in foreign countries like occupants of a zoo. It’s their home, so be the polite guest.


Finish off your trip with a close-up of your ticket stubs, postcards and other collectibles gathered on your trip. This can be a wonderful reminder of all the different memories you collected.

Always check your camera’s flash when going into a famous site. Many places do not allow flash photography indoors. Use the “No Flash” scene mode or Landscape scene mode or one of the traditional exposure modes where flash is turned off by default (Program, Shutter, Aperture or Manual).

When inside a dark church or monument, raise your ISO (sensitivity) to 800 or 1600 and brace yourself against a wall or table to avoid getting blur. If your lens has VR (vibration reduction), make sure it’s turned on.

Shoot multiple shots to make sure you get at least one good one.
Try shooting close-ups of parts of monuments or famous buildings. Details of the stones or a relief will combine with your overall shots to tell a more complete story about your visit.

Get great travel photos by doing postcard research. Look at local postcards to get an idea of where pretty pictures can be made. The backsides often tell where the photo was taken. Then go out and improve on the postcard shot.

Look down for details shots. Sometimes the simplest things can be right at your feet. On a fall day, leaves can make up an amazing display of patterns. Or on a trip to a historical place, you can round out the story of the trip by shooting the cobblestones in the street.

If you're photographing a historical site, try to find a new way to capture the beauty or importance of the scene. Look for small details, or try to capture the funny interplay between the historic site and modern life. A group of tourists wearing short-shorts in an Antebellum home makes an interesting statement.

If you want to shoot the stained-glass windows in a church or other building, first make sure that you're allowed to take photos. Then to expose for the light of the window. The building interior will go dark but the light shining on the windows will create pretty images.

Road signs (especially funny or interesting ones) are a great addition to a travelogue. They'll also help you remember where you took your vacation photos, so snap pictures of important, fun, historic or colorful road signs and markers.

When on vacation, designate one day to rise early and photograph the sunrise at a photogenic location. Ask locals where the best place is to watch the sunrise and capture your locale with great light.

Several frequent travelers we know record every hotel room for their albums and slide shows.

Pretend to be a tourist in your own hometown; capture places of interest through the eyes of a visitor.

Always give viewers of your photo an easy indicator of the grandness of your experience-so even at the Grand Canyon, have something in the scene for scale.

Find out when the tourists gather at a monument, and avoid those times to get a clean postcard-like shot. Early morning works well for this, and the light can be nice at that time, too. Include people if you want to give a sense of scale.

Sometimes when traveling, you come across great images just from sitting down at dinner, riding in a cab, waiting for a bus or standing in a line. Always be prepared and have your camera ready for those special, unexpected moments.

Capture details when traveling. Every place is unique. The doorknocker on the hotel, the buttons on the bellman’s uniform or the rows of baseball hats at the stadium provide great storytelling pictures. Don’t be afraid to experiment and think detail.

Try shooting close-ups of parts of monuments or famous buildings. Details of the stone or a relief will combine with your overall shots to tell a more complete story about your visit.

Shooting monuments can be exciting and sometimes discouraging if you are there at the wrong time. Figure out which direction the icon faces. Check a map and see when it is lit by the sun. Plan your visits when the light is striking the monument from the front or side for best photos.

When visiting a historic site, try to tell a story with your camera. Move back and shoot an overall photo. It’s even better if you can find a high spot to shoot from to get a sense of size and scale. Then come in closer and look for details—a sign or something that tells more about the site, especially if it’s in a different language.

SPORTS SHOOTING
Try shooting full-length sports portraits. When shooting a head to toe shot of an athlete, check your background and make it clean and simple. Get back and low, use a long lens and don’t forget to include the bat, the hockey stick or other equipment.

Be patient and let the sports action come to you. If you run around and chase the action, you will most likely find yourself in spot “A” when the action is in spot “B” and vice versa. Find a spot where the action will most likely be and the background is good.


Baseball games provide a lot of angles. Get low, near first base. From there you can see most of the infield action, plus home plate. Try shooting through the backstop with a long lens as the pitcher warms up. But don’t get too close to the action. You don't want to get hurt.


Know the sport you are photographing. Understanding the sport allows you to position yourself in a good location to capture the action. If your child plays sports, ask her about her position and where she is during most games. Use that information to place yourself for great shots

Freeze the sports action. The key is using a high shutter speed. On compact cameras, use the sports scene mode. On a D-SLR, pick a high shutter speed of 1/500th of a second or above. This will freeze almost all action. If the light is low, adjust your ISO to a higher sensitivity (800-1600 ISO) which will allow you to select a faster shutter speed.

When shooting a portrait of an athlete, use fill flash (or flash turned on even in daylight) to light up the shadow areas under a hat or helmet. This will balance the light from the entire scene and light up the face. On a compact camera, the setting to choose is "Flash On."


Shooting indoor sports is tough. The lighting often is old or a bit strange (mix of different light sources). Try adjusting your white balance to Fluorescent or Incandescent/Tungsten. Check the back of the camera to see whether this has helped prevent the yellow or green tint caused by indoor lighting.

When composing a sports picture, leave some room for the action. For instance, if a runner is going left to right, leave more room on the right side of the frame for him/her to run into. This will make a big difference on the impact of the image.


Don’t stop shooting after the action has finished in sports. Get in close on a happy or sad face … a celebration after a goal … or the dejection on the sideline after a loss. The emotion of the game speaks volumes and can really round out a series of pictures.


Don’t stop shooting after the action has finished in sports. Get in close on a happy or sad face … a celebration after a goal … or the dejection on the sideline after a loss. The emotion of the game speaks volumes and can really round out a series of pictures

Get low for great action shots. By getting down on your knees or shooting from a sitting position at a sports event, you will have the action coming right at you. It’s a great way improve your sports pictures immediately.

Get out of the stands during a game or match. Walk along the sidelines or ends of the playing surface. Try it before a game and during warm-ups. By getting closer, will get you better pictures.

If you're photographing a sporting event and you see a bunch of people taking photos from the same spot, go somewhere else. It’s hard to jockey for position (pardon the pun) with a gaggle of photographers, and everyone ends up with the same photo. If you shoot from another spot, you'll capture photographs that are more unique.

When shooting far away from your subjects, such as players on the basketball court and you’re shooting from the bleachers in a gym, for example, turn off your flash. It’s likely that it won’t be reaching the subject and it will drain your battery.

When shooting sports, think monopod rather than tripod. It'll give good support and allow easier, quicker movement.

For sports photos, get close, then get closer (without getting in the way). The sidelines are better than the bleachers; a telephoto lens is better than anything.

Try changing your position when shooting sports. Shooting from under the basket in a basketball game will always get you a picture, but try going into the stands and getting at basket level. With a zoom or long lens, capture the action as the players come up to your level.

Be ready and have a plan for shooting a game. During halftime or timeouts, check your batteries and memory cards. It’s also a good time to reposition for the rest of the game. Always be ready for the crucial play.

Look for emotion. Watch the bench, especially at critical moments. Capturing the jubilation or dejection of the coach and the players on the sideline during a penalty kick or last minute shot can produce the best sports pictures.

Shooting indoor sports is tough. The lighting often is old or a bit strange (mix of different light sources). Try adjusting your white balance to Fluorescent or Incandescent/Tungsten. Check the back of the camera to see whether this has helped prevent the yellow or green tint caused by indoor lighting.

Listen to the pros on the radio. Listen to the game and hear what the experts are saying might happen next. It’s a great way to anticipate the action, especially if a Hall of Famer says the ball will be thrown to the left side of the field.

Take plenty of pictures. With the split-second nature of sports, it is extremely hard to capture every moment perfectly. Shooting a lot will increase the odds of getting the one great photo you'll want to share. Put the camera on continuous shooting to maximize your efforts.

Getting great soccer pictures can be simple. Take control of the situation. Go behind the goal during warm-ups and concentrate on the shot you want, focusing on your main subject. You will have multiple opportunities and won’t be in anyone’s way.

SOME COOL MOMENTS
As the cake is delivered at a birthday party, move down low to the child’s eye level to see what he sees when blowing out the candles. The perspective change will add a different feel to your party pictures.

At farmer’s markets and bazaars don’t just concentrate on the products or produce. The people working there often have incredible stories to tell and make fascinating subjects when they’re surrounded by what they do.

Sitting around a campfire and roasting marshmallows? You can get some great shots in the light of a fire, but remember that if the fire’s in the picture, the camera’s meter can be fooled by the brightness of the flames. Compose and meter your exposure on your subjects’ faces to expose them properly.

Shooting vertically can really change the way you see. Many things go top to bottom, not side to side. Fill the frame with what's important. For portraits and pictures of monuments, vertical can be the preferred framing, but try it in other situations as well.

Check the direction of the light. Sometimes the best light on a person, monument or scene is not the most obvious. Moving around and seeing the light from all angles will expand your vision and make a unique picture. Make it a habit to do this whenever you have time.

Don’t forget to bring your camera to holiday barbeques so you can capture all of the fun. Take pictures of the food being grilled, games being played, as well as groupings of friends and family.

Bring your camera when you go to National Day Parade. You can make great pictures of your children as they get ready to march, as well as on the parade route. If your child is in the band, take close-ups of their musical instruments.

Don’t let telephone poles or trees sprout out of your subject’s head. Check the background carefully. Look over your subject’s shoulder to see whether any poles, trees or even cars are in the background. Sometimes simply moving a step to the left or right a few feet can make your picture much better.

Looking for a self-assignment that challenges creativity? How about taking a self-portrait each day for a week, or a month? How many interesting, unusual and humorous ways can you find to portray yourself?

Parade passing by? Look for details and unexpected views, like reflections in a shiny tuba, a blurred twirling baton, the chrome gleam of a fire engine.

GROUP PICTURES

Parties are about people. Make a special effort to shoot close-ups of faces with a zoom lens. Then mix it up with group shots of two to three or more people. Take some photos of the food. And don’t forget the big group shot. Remember to use the self-timer to get yourself in the photo.

With group photos, make sure your location can handle the size of the group. Sometimes, getting up on a small ladder or standing in the bleachers of a sports field can help you get everyone into the shot, and make sure all their faces are visible. Remind them that if they can’t see your face, your camera won’t be able to see theirs. Make a great team picture.

Get the team together in front of a nice background—maybe the goal, the net or the team logo on the field or floor. Shoot the ordinary, and then let the kids have some fun, making faces or funny poses. That’s the one they will always remember.


It’s always best to shoot group pictures in a location that tells something about the group. For example, shoot the sports team on the field instead of the parking lot. Try to think about how the background, or setting, adds to the story of who they are.

Place your subjects equally away from the camera when shooting a group. Avoid placing any of your subjects a lot closer to your camera than others. That can lead to some of your family members being out of focus or just looking a little out of the mix.

Be creative with your posing. Don't just line everybody up. Use the steps or the arm of a couch to experiment with some people standing and others sitting. Have kids sitting in laps or someone sitting on the floor or kneeling. Mix it up.

At parties, ask people to put down their drink or plates. You want to see the people in the photo, and glasses or silverware can be distracting. And try to make sure no one is eating. That’s a shot no one wants to see.

When making group pictures, shoot, shoot, shoot. Put your camera on continuous and fire away. Often the fourth or fifth picture is the best one because everyone has settled down and eyes are open and mouths shut.

Parties are about people. Make a special effort to shoot close-ups of faces with a zoom lens. Then mix it up with group shots of two to three or more people. Take some photos of the food. And don’t forget the big group shot. Remember to use the self-timer to get yourself in the photo.

Group photos at a party can be fun. Try to do them early in the event when everyone has plenty of energy. Look for natural groupings of a few people getting caught up on each other’s lives. Use the camera’s flash if there’s not much light in the location.

Make a fun shot at the beginning of a group shoot. Ask everyone to make a silly face, wave or jump. This will loosen up everyone, get them laughing and allow you to get the good posed shot.

Enlist the help of a spouse or child when shooting family pictures. Have someone hold a reflector or light so they can move wherever you need them to for the best light. This can make your job easier as the photographer and make it more fun.

Take control of a group shot by getting to the location early, figuring out how you want to make the picture, then taking charge when everyone arrives. Having a plan will let you concentrate on making a good photo.

Try shooting a group photo with a longer zoom lens, instead of just a wide-angle. By standing back 20 more feet or so, you can lessen the impact of the background and focus on the people in the shot. You may have to yell your instructions to the group, but your shot will be dramatically different.

LANDSCAPE PICTURES & NATURE
When photographing a landscape scene, include a point of interest. An item that stands out, like a tree or a cliff edge, will give the viewer's eye somewhere to rest. It will also provide a sense of scale.

Combine a landscape photo with a family portrait. Place your family off-center to highlight the background. By placing them to the side and shooting a wide shot, you get a great landscape and your family in the same shot.


Shoot landscapes at the most vibrant times of the day. Midday shooting often does not produce the results you are expecting. Shoot your best outdoor shots during the golden hours—soon after sunrise or shortly before sunset.


I
n nature photography, less is often more. It can be more of a challenge to decide what not to put in the picture. Simple, strong compositions can make more powerful pictures. Use scene modes when you can, especially in snow or at the beach when there’s bright light. Those modes are designed to help in those intensely lit situations, by keeping the surrounding scene looking bright while allowing your subject to be seen.

Use a long exposure to soften streams and waterfalls. Place your camera on a tripod and use a small aperture (f/11 or f/22) to drive down your shutter speed to 2 seconds or longer. This will give flowing water the milky look you want. Make sure the camera is steady, then shoot a lot.


Use depth of field in nature photography to get everything in focus. If you are placing an object in the foreground to create depth, use a maximum (high number) f/stop. This will get more of the scene in focus, front to back. If using a COOLPIX camera, set the camera’s scene mode to landscape.

Celebrate the first day of summer by taking photos outdoors. Remember, the first day of summer is the day with the most hours of daylight in the entire year.

Use a long exposure to soften streams and waterfalls. Place your camera on a tripod and use a small aperture (f/11or f/22) to drive down your shutter speed to 2 seconds or longer. This will give flowing water the milky look you want. Make sure the camera is steady, then shoot a lot.

Landscapes benefit from a distinct center of interest to draw viewers' eyes. A tree, a rock, an animal or a person also provides context and scale. A cloud formation will help in a pinch.

Reflections in still water can make for colorful photos; reflections in rippling or flowing water can make for colorful, intriguing abstracts. Experiment with shutter speeds.

Ban the boring beach. After a few shots of folks on blankets, get down low to catch the waves coming in; move in close to shells and driftwood; use the supports of the lifeguard tower as framing devices.

The human eye is twice as sensitive to green as it is to any other color. That means anything with green will jump out to the viewer. If a subject is wearing green it can overpower their face. If a background is bright green—even out of focus—it will jump out more than anything else in the photo.

To get a smooth, silky look to the moving water of a stream or waterfall, set your shutter speed to 1/15 second or slower; check your results, adjust to taste. Remember, only the water should be blurred, so a tripod is vital.

And yet another: Don't photograph the sunset; photograph the places and things the sunset lights up. Prosaic objects can come magically to life when the sun's rays strike.

Another sunset tip: the sunset may make for a beautiful image, but for additional interest look for framing devices and objects or people silhouetted by the setting sun.

If you're shooting a sunset, stick around. Often the most interesting light appears when the sun drops below the horizon.

When shooting landscapes, consider using a polarizing filter to darken skies while increasing the contrast and saturation. This simple filter is adjustable and will allow you to maximize your control over the scene. Remember, to be most effective the sun needs to be to your left or right, not in front or behind.

IT'S ABOUT ANIMALS

Many of the best wildlife photos are the ones with eye-to-eye contact with the animal. Be patient. Connecting with another living creature conveys emotion and makes for powerful nature photos.

Walking the dog? Take your camera and depict a dog's-eye view of the world.

When photographing birds, the lighting and background are key. Look for a shot that is simple to see and uncluttered by branches or leaves. Keep inching in closer without disturbing the scene.

The local dog run can be a prime action opportunity. Often the dogs are so into their own play, they won't pay any attention to a photographer.

If you want to shoot something on the other side of a glass window, such as an animal in the zoo, turn off your flash or press it right up against the glass to keep the reflection from flaring in your photo.

Some pets love cameras, but other small animals are often afraid of them. To get good photos of small animals, get them used to your gear. And give them treats when you point the camera at them.

When possible, try photographing your pet outside. The natural light will give you more opportunities to capture the spirit and energy of your pet. Just try to keep the background from being distracting. You can shoot down on a small animal or frame it from ground level against a backdrop of dark trees.

Look for backgrounds that will contrast against your pet. For instance, a black dog will look better against a lighter background, and a white cat will stand out more against a dark background.

Try shooting straight down on a flower. This direct look can emphasize patterns of flowers. Look for one flower that is just a little different to emphasize it and make it the center of attention. A few flowers work better than a whole bunch.

Many of the best wildlife photos are the ones with eye-to-eye contact with the animal. Be patient. Connecting with another living creature conveys emotion and makes for powerful nature photos.

When photographing animals, isolate them with a longer lens. A longer lens (or zoom lens) allows you to narrow in on your subject and create a clean, soft focus background. It will emphasize the subject and make it special.

FLOWERS SHOTS
Lacking inspiration on a dreary day? Buy some flowers and see how many different creative photos you can make with them (macros, still life, as a prop for a portrait). They’ll brighten up the photos and your day.

Those great soft-focus backgrounds you see on so many flower photos? They're often the result of shooting with the lens wide open-that is, at the widest f/stop, which means the shallowest depth of field.

Crop in tight on a flower. With a close-up lens, using a high depth of field (f/8.0 and higher, life f/11), get in close, possibly just the inside the blooms of the flower. The intricacies of nature are on full display when you get in that close.

Try different kinds of framing with your flower shots. Instead of centering the flower, try having it off to the left or the right of the frame. This will allow for you to be creative with the negative space (areas without the subject). Look for the patterns of other out of focus flowers in the background.

For macro shots of flowers in the field–or in a vase on your dining room table–place a white, black or custom-patterned painted piece of cardboard behind the flowers to isolate them and help them appear even more vibrant.

Look for patterns in fall foliage, and zoom in to capture them. A telephoto lens is great for photographing rows of trees on a road or barren branches in patterns. Resist the temptation to capture everything in the frame. Frame it tight and see how the patterns take over the picture.

Try photographing flowers early in the morning when dew is on the petals. If there’s no dew, make your own. Take a small sprayer and fill it with glycerin and water and spray the flowers for those natural looking dewdrops. Glycerin helps the drops stay large, but you can just use water if you don’t have any glycerin.

Contrast can sometimes be helpful in flower photography. Have an assistant hold a piece of cloth behind the flower. For white flowers, a dark piece of cloth or paper can make the flowers stand out better. Or contrast colors, like yellow flowers against a bright blue piece of fabric.

Flowering plants look great after a nice morning rain. You don’t always have to wait for Mother Nature though. Bring a spray bottle of water and spritz the flowers you want to photograph to get the same effect.

THE WEATHER SHOTS
Sometimes the sky is nondescript and just plain. Try reducing the amount of sky in the frame, by getting up higher and looking down more. Or getting down low and make your subject large in the frame with just a bit of sky above it. This will emphasize your subject and de-emphasize the boring sky.

You don’t always have clear blue skies, and cloudy gray skies can ruin a photo. Try using a color graduated neutral density filter to make the sky more interesting while leaving the foreground natural. Adjust the filter so its mid-point is on the horizon line in your shot.


In bright sunlight, when you may be focusing on the sky, set your exposure compensation for -1 to darken the image and the sky. This adjusts the meter to allow less light into the exposure. If you have a subject in the foreground, make sure he doesn’t become too dark.

When shooting in bright sand or snow, experiment with the exposure compensation settings (the +/- button) on your camera. Set it for +1 to make the image brighter, which often will make sand or snow look better.

Change your white balance during a sunrise or sunset. Take your camera off auto white balance and switch to Cloudy or Shady white balance. This will add more strength to the reds, oranges and yellows. Auto White Balance tries to keep colors neutral.

Experiment with the white balance settings outside. White balance on your camera will alter the color temperature and appearance you get in your picture. For instance, a CLOUDY setting will give your pictures a warmer cast. The FLUORESCENT setting will make your photographs cooler, skewing to a purple cast.

Look up for amazing patterns and shapes. We usually look straight ahead. So gain a new perspective by seeing shapes, patterns and subjects right above you. Take in the planes high in the sky, buildings converging or just streetlights illuminating the dusky sky.

Bad weather shots can be stunning. Get out and shoot in the rain and snow, but keep your equipment dry. Cover your camera with a gallon-size plastic bag. Then cut a small hole in the bag for the lens and tape it down. Put your hand in the open side. You’re ready to shoot.

Different light sources have different color "temperatures." That means photos taken under different kinds of lights (tungsten, fluorescent, halogen, sodium vapor, etc.) look different to the naked eye. You can use this in your photos to create an interesting lighting effect by setting your camera’s white balance to something besides auto. Experiment while using different light sources to get different results.

Want to catch a lightning bolt? Set up a camera on a tripod in a safe spot and set your camera to a small aperture (f/11) and long exposure (10 seconds). The bright flashes of light are most dramatic when set against a backdrop like a cityscape or distinctive landscape feature.

Overcast days are best for outdoor portraits as clouds bring a soft, diffuse, flattering light to your subject. Have your subject face the brightest part of the sky, though.

Look for the bits of lines and objects that poke out of the snow after a good storm. See if you can find unusual patterns or shapes in the grass, bushes, playground equipment or leaves. If the sun is out, watch for the interesting shadows these objects can create. This sort of scene can make for some fun close-ups.

On a bright snowy day, pull the hat or the hood on your child’s coat out over their face to shade it from the sun. Or have her turn away from the sun. Step in close or zoom in on her face. It will have soft, even light and be look great.

When shooting in snow (or at the beach), try to take photographs in the morning or early evening hours. The sunlight at these hours is less “white” with warmer tones. It will also lack the harshness that mid-day light has.

Shooting a lightning storm can be exciting. Set you camera to record a long exposure. In SLRs, 15 seconds is a good start, but you may have to go to 30 seconds, or bulb setting (where the shutter stays open as long as you hold down the shutter button). Because you never know when the lightning will occur, keep shooting for best results. And don’t forget the tripod! Otherwise you’ll have blurry photos. Frame your storm photograph before it happens. Remember that the sky is your subject, so dramatic clouds are what you’re framing for, and then you hope that lightning will happen in that space. Keep the horizon in the lower third of the frame with the sky the top two-thirds.

Sometimes the sky is nondescript and just plain. Try reducing the amount of sky in the frame, by getting higher and looking down more. Or get low and make your subject large in the frame with just a bit of sky above it. This will emphasize your subject and de-emphasize the boring sky.

In bright sunlight, when you may be focusing on the sky, set your exposure compensation for -1 to darken the image and the sky. This adjusts the meter to allow less light into the exposure. If you have a subject in the foreground, make sure he doesn’t become too dark.

The contrast between motion and a still object can be fascinating. Find a bird in the snowstorm and shoot with a slower shutter speed. The snow flying around the bird will blur, but the bird will stay sharp perched on the branch. Use a tripod, brace yourself against something or have VR (vibration reduction) turned on to help you keep steady.

NIGHT / INDOOR SHOOTING
Shooting a monument at night can be rewarding. Your eye sees a magnificent scene. But your camera needs your help. With a DSLR, choose a low ISO (like 200 or 400). Set your white balance to Tungsten. Use a tripod or a steady surface, and be sure to turn off the flash.

Capture the hustle and bustle of the city at night. Place your camera on a tripod and use a long exposure (slow shutter speed) to blur the movement of cars and people. Try shooting for about 10 seconds first, and then adjust creatively to catch the motion of the lights and the feel of the city.

Tripods extend your shooting time into the dark. Turn off the flash so the camera will know to shoot a slow shutter speed (creating a long exposure), then use the self-timer so you don’t introduce movement and blur when you press down the shutter button. A cable release will come in handy during long exposures.

Turn on the lights when shooting inside the house. Lamps and overhead lights will brighten any picture indoors. The light will add depth to the picture and often warm up the color. Most importantly, it will brighten up the background to avoid the harsh, bright-subject-dark-background look of a flash.

Try turning off your flash at night to get what your eye really sees. If it's at all dark or dim, the camera will try to fire the flash. Find the flash off icon (usually a lightning bolt with a line through it) and select it. Make sure to hold steady, or use a tripod, because the shutter speed may be slow.

In movies, streets at night are often wet. That's because the reflections off water make the street stand out. You can get this effect, too, by photographing a street at night, right after a rain. Streetlights and even the tail-lights of cars look better on a wet road.

Sitting around a campfire or roasting marshmallows? You can get some great shots in the light of a fire, but remember that if the fire's in the picture, the camera's meter can be fooled by the brightness of the flames. Compose and meter your exposure on your subjects' faces to expose them properly.

When shooting indoors, open curtains to add window light or turn on the lights in the room for additional ambient light.

Night street, great scene, great colors, but no tripod to steady a longish exposure? Take a vertical shot while pressing the bottom of the camera against the side of a lamp post.

Try using a Preset or custom white balance in a stadium or indoor arena. Because light often is different at indoor venues, the best way to get optimal color is to create a unique white balance, which is what the Preset does. Cameras vary in how to accomplish that so check your manual.

Shooting pictures in the low light found at most parties can be challenging. Turning on your flash or putting the camera in the Party or Night Portrait scene mode can help. This will expose for the available light and add flash to light up your subjects. Keep in mind that this often means a slow shutter speed, so be steady and ask your subjects to hold still.

Shooting a monument at night can be rewarding. Your eye sees a magnificent scene. But your camera needs your help. With a DSLR, choose a low ISO (like 200 or 400). Set your white balance to Tungsten. Use a tripod or a steady surface, and be sure to turn off the flash.

When shooting night-time landscapes, use a low ISO (400 or below if possible) while working from a tripod. Open your aperture to F4 or F 5.6. This will allow you to have a shot full of detail and of good quality. Remember that night shots need a subject, just like day shots.

FOOD PHOTOGRAPHY
Food photography can be very challenging but practicing can improve your overall photography. Try different lighting techniques to make the food look as yummy as it tastes. Use available light or sidelight from a window.


CAMERA'S TIPS

Keep your camera manual in your gear bag so it’s handy if you need to solve a problem while out shooting.

If your camera allows you to adjust the output of the flash, try turning it down some to get more natural looking photos. Lessening the amount of light one-half to one full f/stop may help balance out the natural light with the flash.

Always take along an extra battery (or batteries) when you go out in the cold to shoot. Keep the battery inside your jacket, close to your body for warmth. If the first battery dies, replace it with the warm one and put the cold one inside your jacket to warm up. Nothing ruins a great shot more than a dead camera.


Take plenty of pictures. With the split-second nature of sports, it is extremely hard to capture every moment perfectly. Shooting a lot will increase the odds of getting the one great photo you'll want to share. Put the camera on continuous shooting to maximize your efforts.


With external flashes (Speedlights) you can create a more pleasing look to the light by changing the angle of the flash. You can do this by aiming it at the ceiling or at a wall to the side, creating what’s called “bounce” light. This adds light more evenly to the entire scene and makes your shot look more natural.


Whenever possible, get it right in the camera. Crop your shot, set your white balance, have your ISO and exposure set properly before you shoot. This will save you time later, by not having to waste your evening sitting at the computer trying to fix problems.


Use a polarizing filter to lessen or eliminate reflections from glass. This works really well on windows of stores or cars. But the trade-off is that your exposure will be a bit longer, as the light is cut down by almost two stops.
Invest in a long zoom lens for your D-SLR camera. A 200mm lens or longer will allow you to get close to the action. Great sports images are about getting in close. If you are using a compact camera, use the longest focal length on the camera.


Check the weather before an outdoor event. Protecting your camera and lens is critical. Consider buying a rain hood for your camera. It will protect your camera and allow you to keep shooting. If you don’t have one, use a gallon-size plastic bag or trash bag with rubber bands to protect your gear.


Be ready and have a plan for shooting a game. During halftime or timeouts, check your batteries and memory cards. It’s also a good time to reposition for the rest of the game. Always be ready for the crucial play.


If you have a tripod and lights or stands, get your gear, your background and exposure figured out for the portrait before the subject gets there. That way when the subject arrives, you can pay attention to them. This will allow you to be more interactive with your subject and get them in the right pose instead of fiddling with the equipment.


Try using a preset or custom white balance in a stadium or indoor arena. Because light often is different at indoor venues, the best way to get optimal color is to create a unique white balance, which is what the preset does. Cameras vary in how to accomplish that so check your manual.

Protect your SLR lenses. Get a good UV, Skylight or Neutral Clear filter for the front of every lens. This will help protect the expensive front piece of glass in your lens. When you get in dirty or rainy conditions, you'll be wiping the filter clear instead of risking the front element.

Explore composition by adding different lenses to your camera bag. Introducing a wide angle for really wide shots and a telephoto for that tight close-up lets you add variety to your shots.

When working with light, try to keep it off to the side or behind your subject. Light coming in at an angle almost always makes for a more interesting photo, creating patterns and shapes that straight-on light doesn’t.

Keep your camera with you as much as possible. You never know where you’re going to find that great photo. Have the camera loaded with memory, charged up and ready to shoot at a moment’s notice. It might be at the airport, in a cab or just while walking the dog.

Don’t forget to use macro mode when shooting close-ups with a COOLPIX camera. Close-up photography is an amazing world you should explore. The Macro mode often lets you focus within inches of the subject. The Macro mode is designated by a button with a drawing of a flower next to it.

Go shooting with a friend. Not only will you add another pair of eyes to find interesting subjects, but you’ll also feed off of each others ideas and energy. Try to organize regular shoots in the park. Share lenses or tips on making that unforgettable photo.

Sometimes you just need to throw out the rules. Tilt the camera for different angles and unique compositions. An old filmmaking term is called “Dutch Tilt” (made famous by Alfred Hitchcock). It’s skewing the horizon or lines in the picture by being different. As long as something is recognizable, it will work.

Want to experiment using a reflector to add a little light onto your subjects? Mylar "space blankets" and rolls of aluminum foil make great reflectors, are inexpensive, and can really improve the quality of light in a photo.

After you have downloaded photos from your memory card, and checked the computer to make sure the files are visible, reformat the memory card in the camera. Don’t use the “delete all” function of the camera or your imaging program.

One of the most important settings on a camera is Exposure Compensation. It looks like a +/- sign. Here’s the quick rule of thumb: Adjust it towards the + setting when you want your photo to be lighter and the - setting when you want it darker. (The settings are in fractions of an f/stop so moving +.3 is a third-of-a-stop lighter.)

Need to diffuse the light from your flash in a pinch? Use a tissue held a few inches from the flash. The transparency of the paper will be enough to let some light through, and soften the light.

Because a roll of 35mm film was limited to, at most, 36 shots, good photographers had to be frugal in choosing when to shoot. Digital photographers often shoot frames indiscriminately. Give yourself an assignment and a fixed number of frames as an exercise. It will force you to think more about what images are truly worth shooting.

You can utilize everyday objects to help support your camera. Press your camera against the side of a lamppost to shoot vertically or rest the camera on the top of a mailbox or fence to get a more stable photo.

Don’t clean off your lens with a napkin or a T-shirt—they only spread the grease on your lens and can scratch the glass. Instead carry a lens-cleaning cloth (you can get one at a photo or eyewear store) and use that to get your optics streak-free. Be sure to blow off any dust or grit first, so you don’t grind it into the lens.

Don’t look at the LCD screen after every photo you take because you may miss other photo opportunities.

Practice changing your camera’s settings with your eyes closed — it’s a great way to develop “muscle memory,” the ability to perform an action without thinking about it. Be able to turn your camera on and off, change the memory card and battery, and locate all of the buttons and dials on the camera without looking.

If you know you’re about to photograph something important, get ready. Turn your camera on, take off the lens cap and make sure the settings are correct. Otherwise you may miss the shot if you’re fumbling with the camera.

A good vantage point is critical in photography. Try shooting from above or below your subject to turn an ordinary scene into an extraordinary photograph.

When photographing an event, let your instincts take over. As soon as you see something that catches your eye, snap a photo. Then, once you have a shot “in the can,” take more time to capture a different view of the scene.

Experiment with different flash effects. Try placing colored gels over the front of the flash. You’ll be surprised at how that little bit of color can change the look of a photo.

Practice taking images with manual control over the sensitivity of your camera. Make it a point to think about what ISO would be best for what you’re shooting, and set it yourself. This will help you gain more control over the camera.

Spend a day focusing on composing photographs. Only take one lens with you. This will challenge you to re-think the way you take photos.

Use an online community like Nikon’s MyPicturetown or Flickr to improve your work or get feedback from others about your photography. Post images and ask for criticism or look for weekly photo themes to help pick subjects.

Pro photographers have an intimate understanding of how their cameras work, and that’s part of how they get great shots. The more time you spend taking pictures and the more comfortable you get with your camera’s controls, the more attention you can pay to what you’re shooting.

To freeze motion, choose a fast shutter speed, (1/500 or faster). If you are using a COOLPIX camera, set the shooting mode to “sports” which tells the camera you want to freeze fast action.

If you’re photographing an event like a wedding or party, don’t forget to take care of yourself. The excitement of the shoot can make you forget to be hydrated and eat during the day. All the running around and carrying heavy equipment can easily dehydrate you. If you don’t feel good, you’re less likely to take good pictures.

Sharpen your skills is by spending a day photographing nothing but colors. Pick a color you like and photograph everything you see with that color. Pay particular attention to shapes, light and texture.

A “gray card” (a card that’s printed an 18% shade of gray) can be placed in your images to help you correct white balance and color casts with your computer after you’ve photographed an image. Put one in your frame and take a shot, and then use it as your sample point for white balance with the computer on any other shots with the same lighting mix.

Remember to purchase a UV filter for the new lens you just bought. The filter can protect the front element of your lens and cut down on the Ultraviolet light reaching the camera’s image sensor.

Protect your SLR lenses. Get a good UV, Skylight or Neutral Clear filter for the front of every lens. This will help protect the expensive front piece of glass in your lens. When you get in dirty or rainy conditions, you'll be wiping the filter clear instead of risking the front element.

Light behind your subject will silhouette him, her or it, which is okay if a silhouette is what you want. Otherwise, use fill flash or take a manual exposure based on a reading of the subject, not the light coming from behind.

Third oldest trick in the book: a beanbag. You'll be amazed at the number of times it'll save the day as a small, lightweight, eminently portable camera support for nature, outdoor, even travel photography.

Second oldest trick in the book: the rule of thirds. See the frame as a tic-tac-toe grid; place your subject at any one of the intersections to create a more interesting, dynamic composition.

Oldest trick in the book: leading lines. Anything that draws your viewers' eyes into the photo-railroad tracks, a tree line, a fence-is incredibly effective.

Long exposure called for, but no tripod in sight? Support the lens with your cupped palm; draw your elbows in tight to your body; hold your breath; think, "I'm the tripod now."

Panning with a moving subject blurs the background to emphasize movement and/or speed. It takes practice to get the "right" pan speed, though. Got a dog?

When you see a really cool photo on Flickr, see if photo info is provided. No harm in knowing the f/stop, shutter speed, ISO and focal length of the lens.

When shooting out the window of a plane, make sure your only point of contact with the plane is your seat. Touching the window, wall or armrest transmits more vibration to the camera.

Selling something on eBay? The better the photo, the better the bids. Go for clean backgrounds, precise focus, great lighting, lots of detail.

Secret weapon of pro shooters: a lens hood to fight flare.

In any auto metering mode, dial in various degrees of exposure compensation, plus and minus, to see the effect on the mood of your photo. This works best with a tripod-mounted camera.

Experiment with light control. A piece of cardboard wrapped in aluminum foil is a good reflector; or fire your flash through crinkled cellophane.

Polarizing filters can help reduce reflections and darken the sky. Shooting with a compact? The lenses of sunglasses are often polarized; try putting one in front of the camera's lens.

Play with your camera's white balance setting to affect the mood of the picture. Choose fluorescent for a tungsten-lit scene, for example, or set a custom setting to warm up or cool down a scene.

A small light source produces a very hard, harsh light, while a large light source provides a softer light. To make a small light appear softer, bounce it off one or more objects before it hits the subject (ceilings, walls, pieces of cloth—anything will work). Just remember that a non-white object will reflect non-white light.

Instead of using your Speedlight pointed directly at your subject, try “bouncing” the light off the ceiling by pointing the flash head upwards. Check the image on the LCD afterwards to make sure your subject is exposed correctly.

A self-assignment is a great teacher. Pick a topic—street signs, old cars, shop windows—and spend a weekend, a week, even longer. The single topic will push you to think of different ways to depict and capture it.

Knowing your subject means better pictures. Want to photograph bees? Learn their habits. Same with flowers—no kidding. Some bloom only in sunlight, others love shade. Know your subjects' full picture potential.

Making a deliberate mistake can spark creativity. For example, choose the wrong lens for the job—a wide-angle for the Little League game or a telephoto for landscapes. Challenge yourself to save the situation by seeing what you'd have missed with the "right" lens.

Designate "black-and-white day" and dedicate yourself to images in a fine-art and/or photojournalistic mode.

Always take along an extra battery (or batteries) when you go out in the cold to shoot. Keep it inside your jacket, close to your body for warmth. If the first battery dies, replace it with the warm one and put the cold one inside your jacket to warm up. Nothing ruins a great shot more than a dead camera.

If your camera captures RAW and JPEG format at the same time, do it. The RAW files will have the most image information, and even though you may not work with them now, you never know what you might want tomorrow.

Consider yourself a serious shooter? So you always carry a small stepladder and a tripod in the trunk of your car, right?

If a camera store in your area rents gear, try out a lens you've always wanted. Take a telephoto to a ball game, a wide-angle on a weekend camping trip.

Volunteer. Pro bono imaging for charitable organizations can help them with promotional pictures while you test your creativity and resourcefulness.

For cool creativity, designate "fixed focal length day" and use one fixed lens instead of a zoom.

Set your flash to Rear Curtain Sync to fire the strobe at the end of the exposure to create interesting streaks and effects with moving subjects.

Carry more than one memory card with you when you go out to shoot pictures. More than just running out of space, the extra card(s) serves as insurance in case of a card malfunction. It can happen to anyone, at any time, so be ready.

If your camera allows you to adjust the output of the flash, try turning it down some to get more natural looking photos. Lessening the amount of light will help balance out the natural light with the flash.

Use your scene modes when you can, especially in snow or at the beach when there’s bright light. Those modes are designed to help in those intensely lit situations, by keeping the surrounding scene looking bright while allowing your subject to be seen.

Use a polarizing filter to lessen or eliminate reflections from glass. This works really well on windows of stores or cars. But the trade-off is that your exposure will be a bit longer, as the light is cut down by almost two stops.

To shoot a very slow shutter speed in bright light, try a neutral density filter or a polarizing filter from the local camera store. Either one will screw onto the lens of the camera or attach with a holder to the front of the lens. By letting less light reach the sensor, these dark filters will let you shoot at even slower shutter speeds than normal.

Look for a single colorful item in a scene that is otherwise mostly monochromatic (black and white), such as a red leaf on a tennis court or driveway. This creates a center of interest and can be dramatic.

With external flashes (Speedlights) you can create a more pleasing look to the light by changing the angle of the flash. You can do this by aiming it at the ceiling or at a wall to the side, creating what’s called “bounce” light. This adds light more evenly to the entire scene and makes your shot look more natural.

Set your camera’s display (playback) to show you highlight problems. This is a simple feature that will flash areas that are overexposed on the rear LCD screen when reviewing the photos you’ve shot. If large or important areas are flashing, you need to reduce the exposure, often by using the +/- exposure compensation and applying minus compensation.

Use a lot of depth of field when photographing a large group of people. Shoot at an aperture of f/8.0 or smaller (f/11, f/16) to make sure everyone is in focus, especially when your group has 10 or more people. The more spaced out they are, front to back, the harder it will be to keep them all in focus.

If you can’t see your LCD screen on the back of the camera well outside on a sunny day, go into the menu and turn up the screen brightness. Remember to turn it down when you’re done, because a brighter screen will drain the camera’s battery faster.

You don’t always have clear blue skies, and cloudy gray skies can ruin a photo. Try using a color graduated neutral density filter to make the sky more interesting while leaving the foreground natural. Adjust the filter so its mid-point is on the horizon line in your shot.

Tell a story with your pictures. Whether on a vacation or at a sporting event, think about the images that will complement the obvious. Shots of the stadium, a team jersey, the warming-up exercises and the coach talking to the kids will give the event a new perspective.

Use depth of field in nature photography to get everything in focus. If you are placing an object in the foreground to create depth, use a maximum (high number) f/stop. This will get more of the scene in focus, front to back. If using a compact camera, set the camera to landscape scene mode.

Always protect your camera in bad weather. Try to minimize your camera’s exposure to the elements by keeping it inside your coat or in a camera bag as you move from place to place. Protect it from the elements when you can, to keep out moisture.

Use panning for a different action shot. Slow down your shutter speed and follow the subject (panning) with your camera as you take the picture. This will blur/streak the background and keep your subject in focus. Try to shoot about 1/30 of a second as you follow the action.

You should format the memory card in your camera on a regular basis. By using the camera’s built-in "Format" function, found in the menus, you lessen the chance of having card problems in the future. This is better than just deleting the images using the camera or the computer.

When doing macro (close-up) photography, remember that your odds of success go up when you take advantage of more depth of field (f/11 or f/16) and use a tripod. This will give you a better chance of having the focus you want and allow you to shoot in any type of light, bright or dim.

Don’t blow snow off a camera lens. Use a small brush or a bulb blower. The moisture in your breath might melt the snowflakes or even form frozen condensation on the lens. You could make a bad situation worse.

In nature photography, less is often more. It can be more of a challenge to decide what not to put in the picture. Simple, strong compositions can make more powerful pictures.

Safeguard your memory card. To prove ownership, take a photo of yourself or a business card as the first frame. Lock the image from the menu on the back of the camera. This will keep this image there all the time and improve the odds of a card getting back to you should you lose it.

BIG HUGZ to all who shared the tips, AMAZING ;)